Monitoring : Shinken
Monitoring : Shinken
: applicable sous Debian 7 et Ubuntu 14.04.
Shinken (actuellement un version 2.2) est un outil de supervision. Pour des informations détaillées, je vous invite à consulter le très beau site de Shinken.
Installation de Shinken
Pour commencer, il faut créer l’utilisateur shinken.
root@debian~#: adduser shinken
Ensuite, il faut installer les prérequis s’il ne sont pas déjà présent.
root@debian~#: aptitude install python-pycurl python-setuptools python-pip sysstat curl
Les outils sysstat permettent, entre autre, de récupérer des informations concernant les sondes CPU.
curl est un outil pour transférer des données depuis ou vers un serveur.
Enfin l’installation de shinken à proprement parler.
root@debian~#: pip install shinken
Une fois installer, voici comment lancer shinken.
root@debian~#: /etc/init.d/shinken start
sortie
Starting scheduler:
. ok
Starting poller:
. ok
Starting reactionner:
. ok
Starting broker:
. ok
Starting receiver:
. ok
Starting arbiter:
. ok
Le deamon arbiter est l’un des deamon principal de shinken. Pour vérifier qu’il est bien vivant, voici la commande.
root@debian~#: curl http://localhost:7770/
sortie
OK
Démarrage de Shinken
En premier lieu, il faut se loguer sous shinken.
user@debian~$: su shinken
Lors de la première utilisation, l’initialisation est nécessaire afin de générer le fichier ~/.shinken.ini.
shinken@debian~$: shinken --init
sortie
Saving the new configuration file /home/shinken/.shinken.ini
La commande shinken -l permet de lister les commandes disponibles.
shinken@debian~$: shinken -l
sortie
Available commands:
desc:
	desc : List this object type properties
doc:
	doc-compile : Compile the doc before enabling it online
	doc-serve : Publish the online doc on this server
shinkenio:
	install : Grab and install a package from shinken.io
	inventory : List locally installed packages
	publish : Publish a package on shinken.io. Valid api key required
	search : Search a package on shinken.io by looking at its keywords
	update : Grab and update a package from shinken.io. Only the code and doc, NOT the configuration part! Do not update an not installed package.
La commande shinken search linux permet de lister les packs de configuration disponible pour superviser un linux.
shinken@debian~$:shinken search linux
sortie
glances (david-guenault) [pack,system,linux,glances] : Standard check through checkglances.py and glances server
linux-snmp (naparuba) [pack,linux,snmp] : Linux checks based on SNMP
linux-ssh (naparuba) [pack,linux,ssh] : Linux checks based on SSH without any script on distant server
pack-glances (david-guenault) [pack,system,linux,glances] : Standard check through checkglances.py and glances server
raspberrypi (frescha) [pack,linux,raspberrypi,server,os] : Standard checks
varnish-ssh (kokosny) [pack,linux,varnish,ssh] : varnish checks based on ssh
Pour installer un pack et les sondes correspondantes, il faut utiliser la commande shinken install nom-du-pack.
shinken@debian~$: shinken install linux-ssh
Les sondes du pack linux-ssh nécessite l’installation de la librairie python-paramiko.
root@debian~#: aptitude install python-paramiko
Ces sondes ont besoins d’une clé ssh pour se connecter à un compte non root. Elles ont aussi besoin des outils sysstat.
Dans un premier temps il faut générer la clé ssh avec la commande ssh-keygen.
shinken@debian~$: ssh-keygen -t rsa
Après l’avoir généré, il faut déployer la clé sur le serveur.
shinken@debian~$: ssh-copy-id -i ~/.ssh/id_rsa shinken@localhost
Enusuite, pour vérifier que tout va bien il faut lancer la sondes manuellement.
shinken@debian~$: /var/lib/shinken/libexec/check_load_average_by_ssh.py
sortie
Ok: load average is good 0.22,0.11,0.10 | load1=0.22;1.00;2.00;; load5=0.11;1.00;2.00;; load15=0.10;1.00;2.00;;
Configuration du premier host, le serveur de supervision lui même. Pour ce faire, il faut éditer le fichier /etc/shinken/hosts/localhost.cfg.
shinken@debian~$: vim /etc/shinken/hosts/localhost.cfg
define host{
		use					 linux-ssh,generic-host
		contact_groups		  admins
		host_name			   localhost
		address				 localhost
}
Pour que les modifications soient prises en compte, il faut redémarrer le service shinken.
root@debian~#: /etc/init.d/shinken restart
sortie
Restarting scheduler
.  ok
Restarting poller
.  ok
Restarting reactionner
.  ok
Restarting broker
.  ok
Restarting receiver
.  ok
Restarting arbiter
Doing config check
.  ok
.  ok
: il faudra redémarrer le service plusieurs fois au cours de cette procédure. La sortie devrait toujours êre similaire à celle présenté ci-dessus. Par conséquent, la sortie du redémarrage du service ne sera plus réécrite.
Il est possible d’afficher les logs en console via la commande tail.
shinken@debian~$: tail -f /var/log/shinken/schedulerd.log
sortie
[1426580 465] SERVICE ALERT: localhost;Load Average;WARNING;HARD;3;
[1426580 465] SERVICE NOTIFICATION: admin;localhost;Load Average;WARNING;notify-service-by-email;
[1426580 497] SERVICE ALERT: localhost;Read-only Filesystems;WARNING;HARD;3;
[1426580 497] SERVICE NOTIFICATION: admin;localhost;Read-only Filesystems;WARNING;notify-service-by-email;
[1426580 524] SERVICE ALERT: localhost;Memory;WARNING;HARD;3;
[1426580 524] SERVICE NOTIFICATION: admin;localhost;Memory;WARNING;notify-service-by-email;
[1426580 550 ] SERVICE ALERT: localhost;NtpSync;WARNING;HARD;3;
[1426580 550 ] SERVICE NOTIFICATION: admin;localhost;NtpSync;WARNING;notify-service-by-email;
[1426580 562] SERVICE ALERT: localhost;NFS Stats;WARNING;HARD;3;
[1426580 562] SERVICE NOTIFICATION: admin;localhost;NFS Stats;WARNING;notify-service-by-email;
Cependant, ce n’est pas très partique d’interpréter les logs de cette façon. C’est pourquoi webui est utilisé.
Installation de webui
Le module webui est une interface web qui fait partie du daemon broker et qui va lire, interpréter et afficher les résultats obtenus dans les fichiers de logs.
Voici comment installer webui.
shinken@debian~$: shinken install webui
Le fichier de configuration de webui se trouve dans /etc/shinken/modules/webui.cfg.
shinken@debian~$: vim /etc/shinken/modules/webui.cfg
aperçu du contenu du fichier
define module {
	module_name		 webui
	module_type		 webui
	host				0 .0 .0 .0
	port				7767
	auth_secret		 CHANGE_ME
	allow_html_output   1
	max_output_length   10 24
	manage_acl		  1
	play_sound		  0
	login_text		  Welcome on Shinken WebUI

	modules
}
Après l’installation du module webui, il faut l’ajouter au broker principal dans le fichier /etc/shinken/brokers/broker-master.cfg.
shinken@debian~$: vim /etc/shinken/brokers/broker-master.cfg
aperçu du contenu du fichier
define broker {
	broker_name	 broker-master
	address		 localhost
	port			7772
	spare		   0

	manage_arbiters	 1

	manage_sub_realms   1
	timeout			 3
	data_timeout		120
	max_check_attempts  3
	check_interval	  60

	modules	 webui

	use_ssl			  0
	hard_ssl_name_check   0

	realm   All
}
Il faut maintenant installer le module d’authentification.
Pour les lister, voici la commande.
shinken@debian~$: shinken search webui auth
sortie
auth-active-directory  (naparuba) [module,broker,webui,auth,authentification,auth-active-directory] : Active directory auth for WebUI
auth-cfg-password  (naparuba) [module,auth,authentification,mod-auth-cfg-password,auth-cfg-password,cfg-password,webui] : Shinken module for UI authentification from simple password for configuration file
auth-htpasswd (naparuba) [module,webui,auth,authentification] : Shinken module for UI authentification from Apache passwd files
auth-pam  (mingbo_wan) [module,auth,authentification,auth-cfg-pam,cfg-pam,webui] : Shinken module for UI authentification via pam
auth-ws-glpi (mohierf) [module,broker,webui,glpi,auth,authentication] : Authenticate Web UI users upon a Glpi Web Service login.
You have new mail in /var/mail/shinken
shinken@debian~$: shinken install auth-cfg-password
Il faut maintenant déclarer ce dernier comme pour les autres dans le module de webui dans /etc/shinken/modules/webui.cfg.
shinken@debian~$: vim /etc/shinken/modules/webui.cfg
aperçu du contenu du fichier
define module {
	module_name		 webui
	module_type		 webui
	host				0 .0 .0 .0
	port				7767
	auth_secret		 CHANGE_ME
	allow_html_output   1
	max_output_length   10 24
	manage_acl		  1
	play_sound		  0
	login_text		  Welcome on Shinken WebUI

	modules			 auth-cfg-password
}
Une nouvelle fois, il faut redémarrer le service pour que les changements soit pris en compte.
root@debian~#: /etc/init.d/shinken restart
Pour se loguer, les identifiants sont renseignés dans le fichier de configuration /etc/shinken/contacts/admin.cfg.
shinken@debian~$: vim /etc/shinken/contacts/admin.cfg
contenu du fichier
define contact{
	use			 generic-contact
	contact_name	admin
	email		   shinken@localhost
	pager		   0600000000
	password		admin
	is_admin		1
	expert		  1
}
Pour se connecter via un navigateur internet, il faut taper l’ip de la machine avec le numéro de port spécifier dans le fichier /etc/shinken/contacts/admin.cfg.
Dans le cas présent, le numéro de port est celui par défaut : 7767.
define module {
	module_name		 webui
	module_type		 webui
	host				0 .0 .0 .0
	port				7767
	auth_secret		 CHANGE_ME
	allow_html_output   1
	max_output_length   10 24
	manage_acl		  1
	play_sound		  0
	login_text		  Welcome on Shinken WebUI

	modules			 auth-cfg-password
}
Donc l’url à taper est quelque chose comme : http://xx.xx.xx.xx:7767.
Le dashboard
L’item de mune « dashboard » n’est pas encore utilisable car il est spécifique à chaque utilisateur et nécessite donc une base de donnée pour pouvoir enregistrer les modifications apporté par les utilisateurs.
La base de données utilisé ici sera sqlite. Pour l’installer, voici la démarche.
shinken@debian~$: shinken install sqlitedb
Ensuite, il faut activer le module en éditant le fichier /etc/shinken/modules/webui.cfg.
shinken@debian~$: vim /etc/shinken/modules/webui.cfg
define module {
	module_name		 webui
	module_type		 webui
	host				0 .0 .0 .0
	port				7767
	auth_secret		 CHANGE_ME
	allow_html_output   1
	max_output_length   10 24
	manage_acl		  1
	play_sound		  0
	login_text		  Welcome on Shinken WebUI

	modules			 auth-cfg-password,SQLitedb
}
: attention aux majuscules.
La page « wall » ne fonctionne pas avec la version installé, la page n’existerait pas.
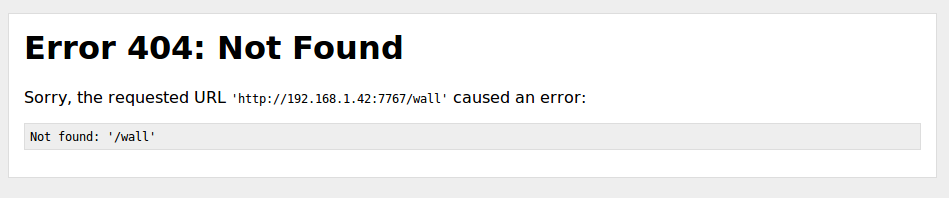
Pour corriger cette erreur, il faut éditer le fichier /var/lib/shinken/modules/webui/plugins/wall/wall.py.
root@debian~#: vim /var/lib/shinken/modules/webui/plugins/wall/wall.py
En début de fichier il faut remplacer la ligne suivante :
from helper import hst_srv_sort
Par :
from shinken.misc.sorter import hst_srv_sort
Résumé des commandes
Voici le résumé des commandes.
root@debian~#: adduser shinken
root@debian~#: aptitude install python-pycurl python-setuptools python-pip python-paramiko sysstat curl
root@debian~#: pip install shinken
root@debian~#: /etc/init.d/shinken start
user@debian~$: su shinken
shinken@debian~$: shinken --init
shinken@debian~$: shinken install linux-ssh
shinken@debian~$: ssh-keygen -t rsa
shinken@debian~$: ssh-copy-id -i ~/.ssh/id_rsa shinken@localhost
shinken@debian~$: /var/lib/shinken/libexec/check_load_average_by_ssh.py
shinken@debian~$: shinken install webui
shinken@debian~$: shinken install auth-cfg-password
shinken@debian~$: shinken install sqlitedb
shinken@debian~$: vim /etc/shinken/modules/webui.cfg
Ce fichier doit avoir les modules auth-cfg-password et SQLitedb d’activé.
aperçu du contenu du fichier
define module {
	modules		auth-cfg-password,SQLitedb
}
shinken@debian~$: vim /etc/shinken/brokers/broker-master.cfg
aperçu du contenu du fichier
define broker {
	modules		webui
}
shinken@debian~$: vim /etc/shinken/hosts/localhost.cfg
aperçu du contenu du fichier
define host{
	use		linux-ssh,generic-host
}
root@debian~#: vim /var/lib/shinken/modules/webui/plugins/wall/wall.py
aperçu du contenu du fichier
from shinken.misc.sorter import hst_srv_sort
root@debian~#: /etc/init.d/shinken restart
URL d’accès : http://xx.xx.xx.xx:7767.
Installation de Shinken sous Cent OS 7
La démarche est la même, cependant les prérequis diffèrent.
Dans un premier temps il faut faire en sorte que la commande lbs_release soit fonctionnelle. Après une installation toute frais de Cent OS 7, cette commande ne fonctionne pas encore.
Pour s’en apercevoir, il suffit de lancer cette commande.
[root@cent-os ~]#: lsb_release
sortie
-bash: lsb_release: command not found
Voici donc comment y remedier, en premier lieu, mise à jour de la machine.
[root@cent-os ~]#: yum update
Installation des prérequis
Installation du paquet qui contient lsb_release.
[root@cent-os ~]#: yum provides */lsb_release
Installation du packet redhat-lsb.
[root@cent-os ~]#: yum install redhat-lsb
Cette fois la commande lsb_release doit être fonctionnel, pour s’en assurer, il suffit de l’exécuter.
[root@cent-os ~]#: lsb_release
sortie
LSB Version: :core-4.1-amd64:core-4.1-noarch:cxx-4.1-amd64:cxx-4.1-noarch:desktop-4.1-amd64:desktop-4.1-noarch:languages-4.1-amd64:languages-4.1-noarch:printing-4.1-amd64:printing-4.1-noarch
Il faut maintenent installer python-pip. Pour ce faire il est possible d’utiliser wgetou curl avec l’opton -o si wget n’est pas installé.
[root@cent-os ~]#: wget https://bootstrap.pypa.io/get-pip.py
Ou
[root@cent-os ~]#: curl "https://bootstrap.pypa.io/get-pip.py" -o "get-pip.py"
Une fois le fichier télécharger, il faut le compiler avec python.
[root@cent-os ~]#: python get-pip.py
Pour s’assure que pip est installer voici une commande utilisable.
[root@cent-os ~]#: pip -V
sortie
pip 6.0.8 from /usr/lib/python2.7/site-packages (python 2.7)
Il est maintenant possible de procéder à l’installation de shunken.
Installation de shinken
[root@cent-os ~]#: adduser shinken
[root@cent-os ~]#: passwd  shinken
[root@cent-os ~]#: yum install python-paramiko sysstat
[root@cent-os ~]#: pip install shinken
[root@cent-os ~]#: /etc/init.d/shinken start
[user@cent-os ~]$: su shinken
[shinken@cent-os ~]$: shinken --init
[shinken@cent-os ~]$: shinken install linux-ssh
[shinken@cent-os ~]$: ssh-keygen -t rsa
[shinken@cent-os ~]$: ssh-copy-id -i ~/.ssh/id_rsa shinken@localhost
[shinken@cent-os ~]$: /var/lib/shinken/libexec/check_load_average_by_ssh.py
[shinken@cent-os ~]$: shinken install webui
[shinken@cent-os ~]$: shinken install auth-cfg-password
[shinken@cent-os ~]$: shinken install sqlitedb
[root@cent-os ~]$: vim /etc/shinken/modules/webui.cfg
Ce fichier doit avoir les modules auth-cfg-password et SQLitedb d’activé.
aperçu du contenu du fichier
define module {
	modules		auth-cfg-password,SQLitedb
}
[root@cent-os ~]#: vim /etc/shinken/brokers/broker-master.cfg
aperçu du contenu du fichier
define broker {
	modules		webui
}
[root@cent-os ~]#: vim /etc/shinken/hosts/localhost.cfg
aperçu du contenu du fichier
define host{
	use		linux-ssh,generic-host
}
root@debian~#: vim /var/lib/shinken/modules/webui/plugins/wall/wall.py
aperçu du contenu du fichier
from shinken.misc.sorter import hst_srv_sort
[root@cent-os ~]#: /etc/init.d/shinken restart
Ouverture des ports
Le port utilisé par shinken n’est pas ouvert par défault sous Cent OS 7. Voici donc comment l’ouvrir avec la commande firewall-cmd.
[root@cent-os ~]#: firewall-cmd --zone=public --add-port=7767/tcp --permanent
sortie
success
Il faut recharger la configuration du firewall.
firewall-cmd --reload
sortie
success
Cependant il existe une commande plus élégante consistant à activer un service qui est configurer dans un fichier *.xml.
Ces fichier ont « deux » emplacement, l’un pour les servives avec leur configuration par défaut que le trouve dans le dossier /usr/lib/firewalld/services/. Ces fichiers ne doivent pas être modifier. L’autre emplacement de ces fichiers est dans le dossier /etc/firewalld/services/, qui eux sont à modifier au besoin.
Il faut donc créer un fichier pour le service shinken.
[root@cent-os ~]#: vim /etc/firewalld/services/shinken.xml
contenu du fichier
<?xml version="1.0" encoding="utf-8"?>
<service>
  <short>shinken</short>
  <description>Monitoring</description>
  <port protocol="tcp" port="7767"/>
</service>
Ensuite il faut activer ce service.
[root@cent-os ~]#: firewall-cmd --add-service=shinken --permanent
Enfin, il faut recharger la configuration du firewall.
[root@cent-os ~]#: firewall-cmd --reload
sortie
success
Les ports du service NTP (UDP 123) ne sont pas ouvert. C’est un service qui existe dans la configuration par défaut, mais qui n’est pas activé.
Activation du service.
[root@cent-os ~]#: firewall-cmd --permanent --add-service=ntp
sortie
success
Redémarrage du service.
[root@cent-os ~]#: firewall-cmd --reload
sortie
success
by Nicolas SHINEY | August 20, 2015 | No Comments | Système